
Metadata scanning is a feature that facilitates governance over your organisation's Power BI content by making it possible to quickly catalogue and report on all the metadata of your organisation's Power BI assets. This is very useful to get a complete picture of all your workspaces, datasets, dataflows, users and the lowest level details of the tables and their data types.
This scanning function uses a set of Admin REST APIs that are collectively known as the scanner APIs. With the scanner APIs, you can extract both general information such as artifact name, owner, sensitivity label, endorsement status, and last refresh, as well as more detailed metadata such as dataset table and column names, measures, DAX expressions, mashup queries etc.
This is a very useful tool for the administrators or Power BI power users who can see the status of the workspaces and their usage to take appropriate actions.
General Power BI users can also benefit from this as they can search the catalogue to find what data assets are available within the organisation and accordingly request access to the reports that are of interest to them.
The metadata scanner dashboard allows business users to search the entire content of the Power BI artifacts of an organisation. A user may not be aware of reports and dashboards developed by other teams. With the metadata dashboard, they can easily find the content and request access accordingly.
They can even search for low-level details like column names, types, data sources and the owner of the content. With this information, a user can contact the owner of the report or data source for any further information.
The metadata scanner dashboard is a great tool for administrators allowing them to easily manage and govern the organisation's content.
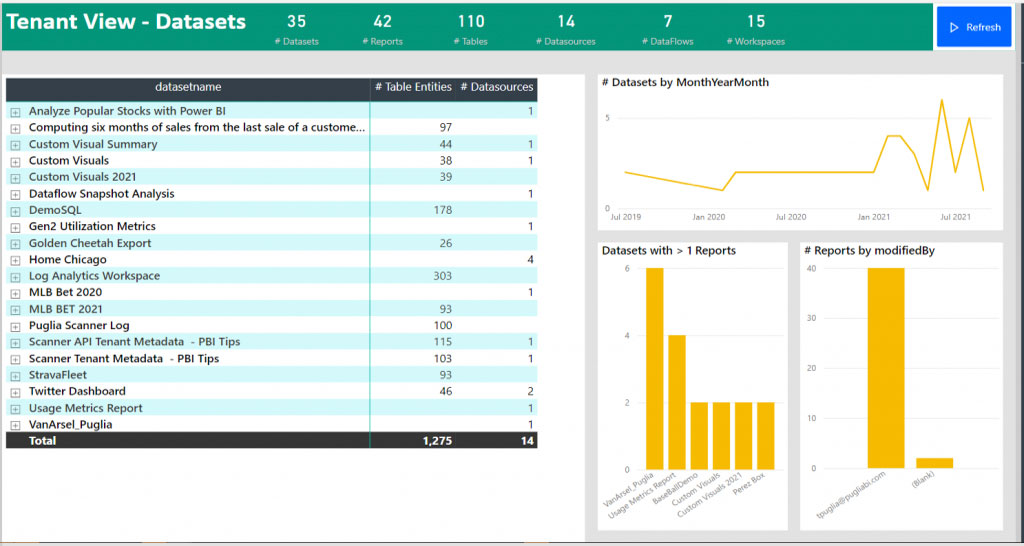
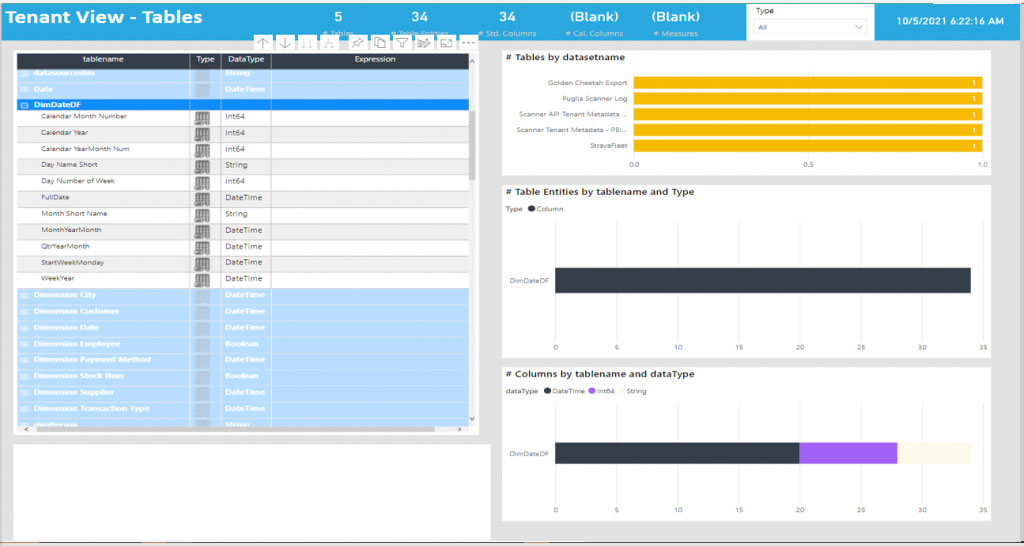
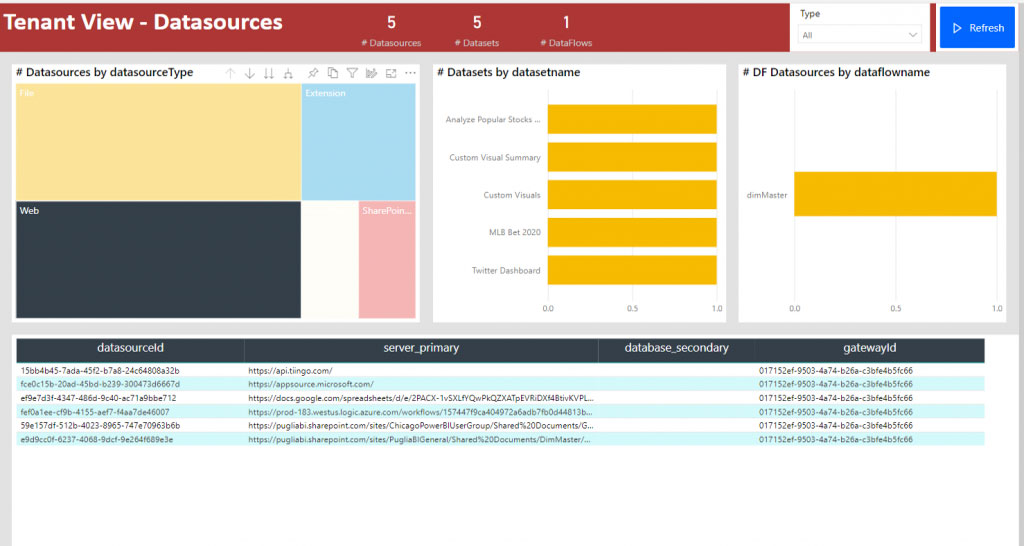
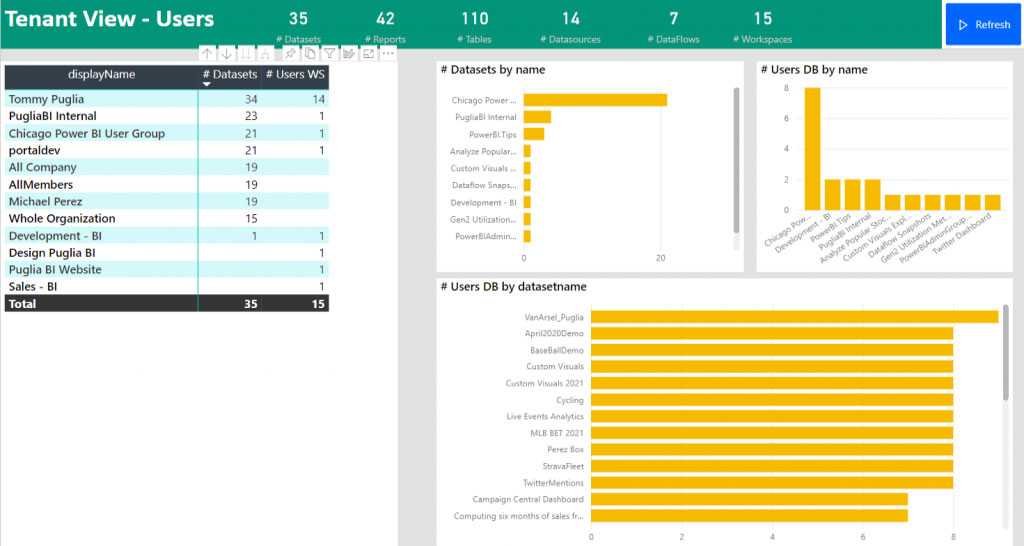
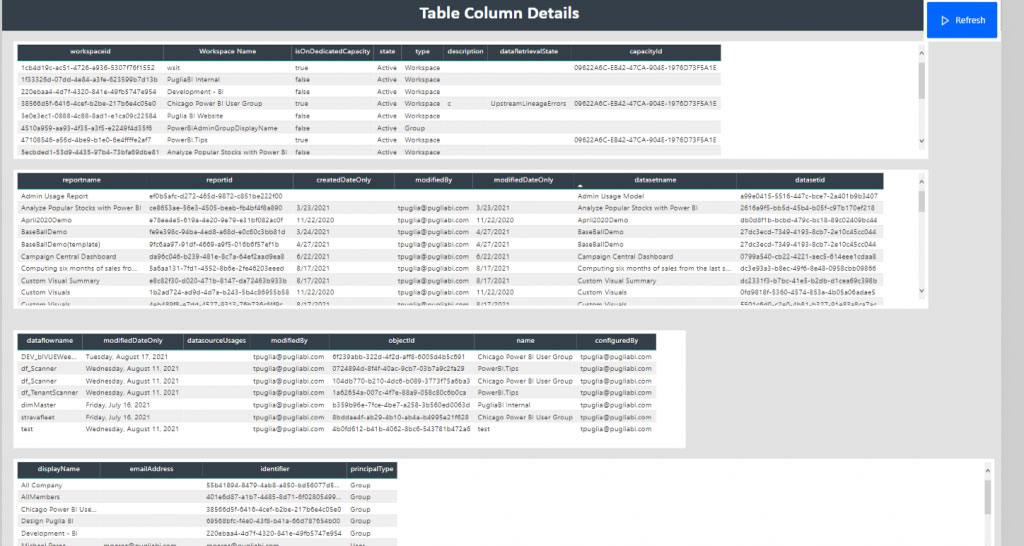
Some of the featured metadata information you can get from the Metadata Scanner are:

The scanning function requires an initial set-up and configuration and then it can be programmed to scan changes in workspaces that have been modified after a certain date.
Huge credit goes to Ferry Bouwman and Tommy Puglia who have created a viable solution that can be integrated into a report. The solution can be downloaded from GitHub.
This solution requires you to set up some initial configurations. Below are the steps for correctly setting up the pre-requisites.
The first step is to register an Azure AD app and assign your app to a subscription. Follow the instructions here.
A few things to note are:
If you already have a security group, then you can use that or create a new security group. You may have to ask your administrator to do this step if you don’t have permission.
Follow the instructions here to create a security group.
Follow the steps here to create a Service Principal and assign your app id (created in step 1) as a member of this Service Principal.
Note: You may have to ask your administrator to do this task.
For this step, you will need to log into Power BI Service as an Admin or ask your administrator to do this task.
Go to Tenant setting > Admin API Settings > Allow service principals to use read-only admin APIs
Download the solution from GitHub. Download the Zip file. The zip file consists of the following components:
Log into Power Automate and go to “My flows”. Under “Cloud flows”, click import and browse to the PBIScanner2022_20220201162202.zip file and import the zip file as it is without unzipping it.
Do the same for the second flow PBIScannerDailyRefresh_20220201162039.zip
The last step is to configure the flows and run them to get a Power BI dashboard that you can publish to your Power BI Service.
Follow the instructions under “Installing & Using” section of this article.
Microsoft Power BI is a business intelligence tool designed to unleash your business potential and help make smarter decisions that propel the organisation forward.
If you’re looking for a better way to manage your data, contact us to discuss an introduction to Microsoft Power BI.
Copyright © Tridant Pty Ltd.